Theolux
Controls
[ Quick links: Home - A0 - A1
- A2
- A3
- A4 -
A5 - A6 - B0 - B1
- B2
-
B3
- B4
- B5
- B6
- B7
- B8 - B9
- B10
- B11
- B12
- B13
- B14 - B15 - B16 - C1
]
The Theolux
lighting control comprises the main console (illustrated below), with
most of the controls required for lighting operation in performance;
the auxilliary wing, housing the notebook computer running the
software, together with the MIDI interfaces and other ancillary
electronics; the Big Lever; the three foot pedals (see images of the
console).
For a
description of how to create and operate a simple show using Theolux,
see here.
The main console
controls:
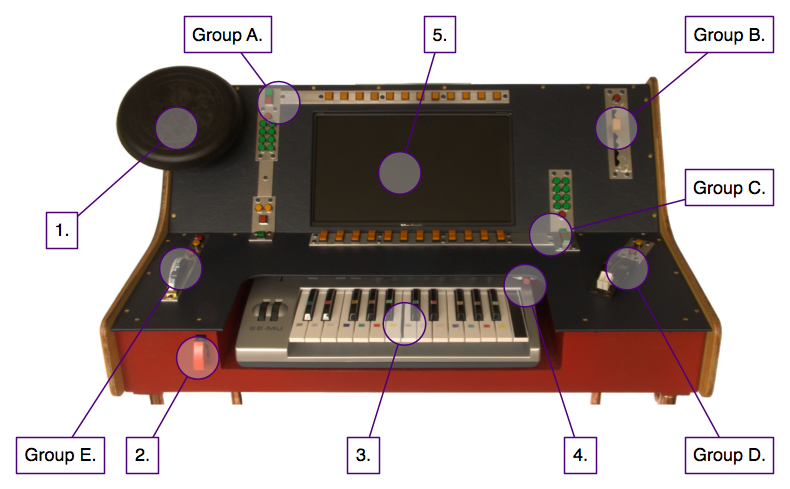
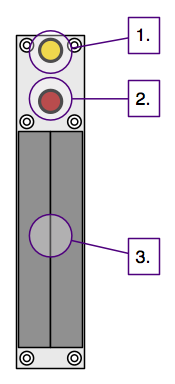
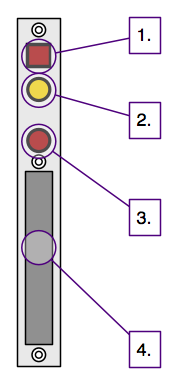
- Impulse
Controller - pad. Hitting the pad percussively triggers the Morph
Controller, sending all threads selected to increase in level to 100%
intensity, and all those selected to decrease in level to 0% intensity.
- Working light
switch - can be used to bring the intensity of a
specified thread to 100%. Intended as a quick way to provide task
lighting in rehearsals or 'emergency' lighting in performance.
- Chord Controller
- keyboard. The left-hand twelve keys (the first
octave) increase the corresponding thread in intensity, while the
right-hand twelve keys (the second octave) decrease the corresponding
thread in intensity. The rate of change is determined by the speed
lever or foot pedal (see Group E).
- Sticky Keys - if
the 'sticky keys' function is selected, the keys
on the Chord Controller keyboard act as if held down when they are
pressed briefly once. A second press releases the key.
- Screen
displaying the thread timelines.
Group A controls
(the Morph Controller)
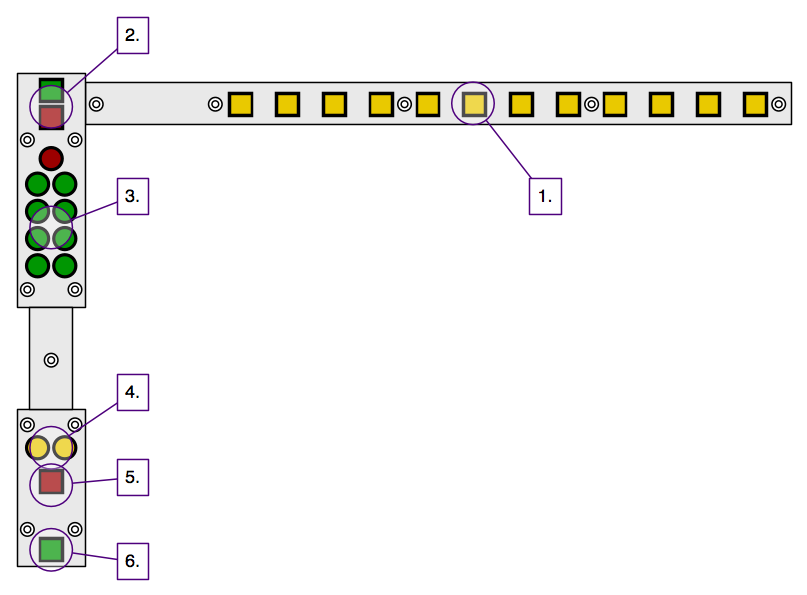
- Thread select buttons - select threads for control by the Morph
Controller.
- Green - selects all threads. Red - deselects all threads.
- Controls to record and invoke preset selections of threads. Press
the red (record) button, followed by a green preset selection button,
to record the current thread selection to one of the eight presets.
Press a green preset selection button to invoke the recorded selection.
- Left button - go to the previous morph. Right button - advance
one place down the morph list, ready to go to that morph when the go
button is next pressed.
- Pause the progress of any morph crossfades currently in progress.
- Go to the next morph in the list.
Group B controls
(the Impulse Controller)
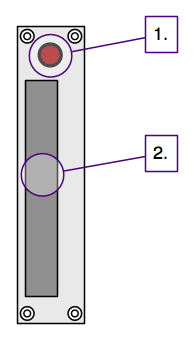
- Sub-controller select button - pressing this button makes the
texture lever active.
- Texture lever.
Group C controls
(the Impulse Controller)
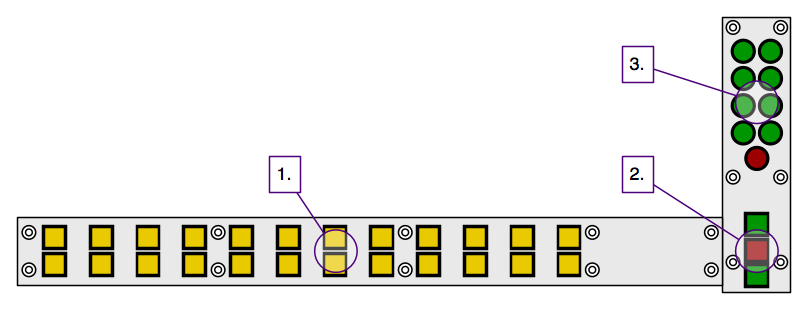
- Thread select buttons - select threads for control by the Impulse
Controller. The top row of buttons selects threads to increase in
intensity, and the bottom row selects threads to decrease in intensity.
- Upper green - selects all threads to increase in intensity. Red -
deselects all threads. Lower green - selects all threads to decrease in
intensity.
- Controls to record and invoke preset selections of threads. Press
the red (record) button, followed by a green preset selection button,
to record the current thread selection to one of the eight presets.
Press a green preset selection button to invoke the recorded selection.
Group D controls
(the Impulse Controller)
- Shaft mastering button - when selected, the Impulse Controller
works in shaft mastering mode (see chapter III.2).
- Sub-controller select button - pressing this button makes the
cross-fade pair active.
- Levers of the cross-fade pair. The left lever controls threads
set to increase in intensity, and the right lever controls threads set
to decrease in intensity.
Group E controls
(the Chord Controller)
- Physics button - when selected, physics mode is on, and the rate
of change of threads selected by the keyboard is controlled by the
accelerator and brake pedals, as if the thread intensity had 'inertia'
(see Part III Introduction).
- Shaft mastering button - when selected, the Chord Controller
works in shaft mastering mode (see chapter III.2).
- Time lever select button - selecting this button makes the time
lever active. Otherwise, the fade time of the Chord Controller is
controlled by the accelerator foot pedal.
- Time lever - sets the time for full travel of intensity from 0%
to 100% between instant ('snap') and approximately five minutes.
Other Controls
Other controls
not illustrated above:
- Chord Controller - accelerator foot pedal.
- Chord Controller - brake foot pedal.
- Morph Controller - 'go' pedal.
- Impulse Controller - big lever (see images of the
console).