Theolux: Creating
and Operating a Simple Show
[
Quick links: Home - A0 - A1
- A2
- A3
- A4
-
A5 - A6 - B0 - B1
- B2
-
B3
- B4
- B5
- B6
- B7
- B8 - B9
- B10
- B11
- B12
- B13
- B14 - B15 - B16 -
C1
]
The following
steps guide the reader through the process of creating and operating a
very simple lighting scheme using Theolux. The description here is
intended to be indicative, to suggest how Theolux is operated, rather
than to provide a detailed 'instruction manual'.
For more detailed descriptions of Theolux's controls, see here.
Programming
Threads and Morphs

- In Theolux's Programmer Window (shown above), add and name new
thread. The thread will have a single morph by default.
- Assign intensity values to channels in the morph as required. (In
the screenshot above, channel 16 is at 40%, and all other channels are
at zero).
- Assign fade in and fade out times for the morph. (In the
screenshot above, the fade times are both 5 seconds).
- Add further morphs as required.
- Repeat for further threads.
The threads are
now ready for use in rehearsal or performance.
Setting a Thread
to the Required Morph
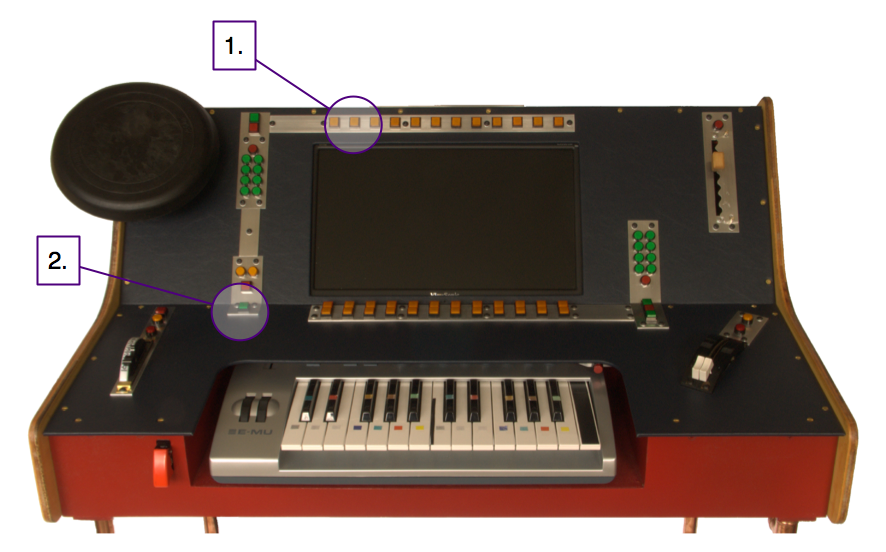
To set each
thread to the required morph:
- Select the thread(s) using the twelve buttons above the display
screen (1).
- Press the 'go' button (2) to change to the next morph on the
selected threads. When the last morph is reached, pressing 'go' again
'loops back' to the first morph. The change from one morph to the next
takes place over the times assigned to the morph.
Controlling
Threads with the Impulse Controller

To control
thread intensities with the impulse controller:
- Select the thread(s) using the two rows of twelve buttons below
the display screen (1); the top row selects threads to increase in
intensity, and the bottom row selects threads to decrease in intensity.
- Select the sub-controller to be used - in this example, the red
button (2) selects the crossfade pair.
- Use the levers (3) to control the thread intensities; the
left-hand lever controls threads increasing in intensity, while the
right-hand lever controls those decreasing in intensity.
Controlling
Threads with the Chord Controller
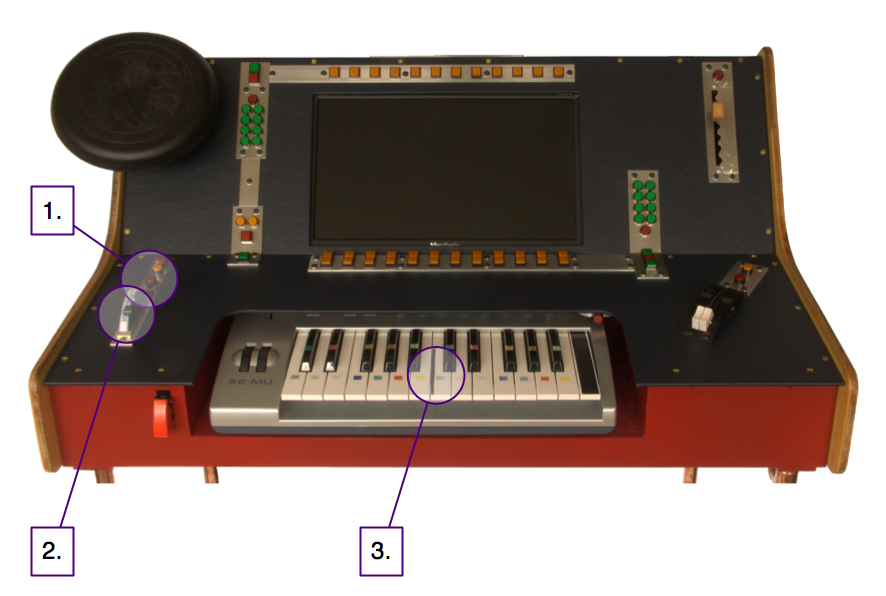
To control
thread intensities with the chord controller:
- Select the time lever with the round red button (1).
- Set a time value with the time lever (2), between zero ('snap')
and approximately five minutes.
- Use the keys (3) to control the thread intensities; the twelve
keys of the left-hand octave controls threads increasing in intensity,
while the right-hand octave controls those decreasing in intensity.
Alternatively,
using the foot pedals:
- Hold down the
keys (3) for the required threads.
- Use the
'accelerator' foot pedal (not illustrated) to control the speed of
change, rather like driving a car.